Weeping tile goes as deep as the footing: the Part 9 wording puts it on undisturbed or compacted soil with its top below the underside of the basement slab, beside the footing, in at least 150 mm of clean stone. It should fall steadily toward the sump or outlet with no low spots. Rigid perforated pipe is laid holes down. The loop rings the foundation, with solid leaders to the outlet and cleanouts at corners.
- Depth follows the footing: the top of the tile sits below the bottom of the floor slab.
- The tile lies beside the footing, not on it and not under it.
- A steady fall toward the outlet keeps water and silt moving; a dip becomes a silt trap.
- Downspouts should never be piped into the weeping tile; they belong on the surface, well away from the wall.
- Cleanouts at the far corners make every future inspection and flush easier.
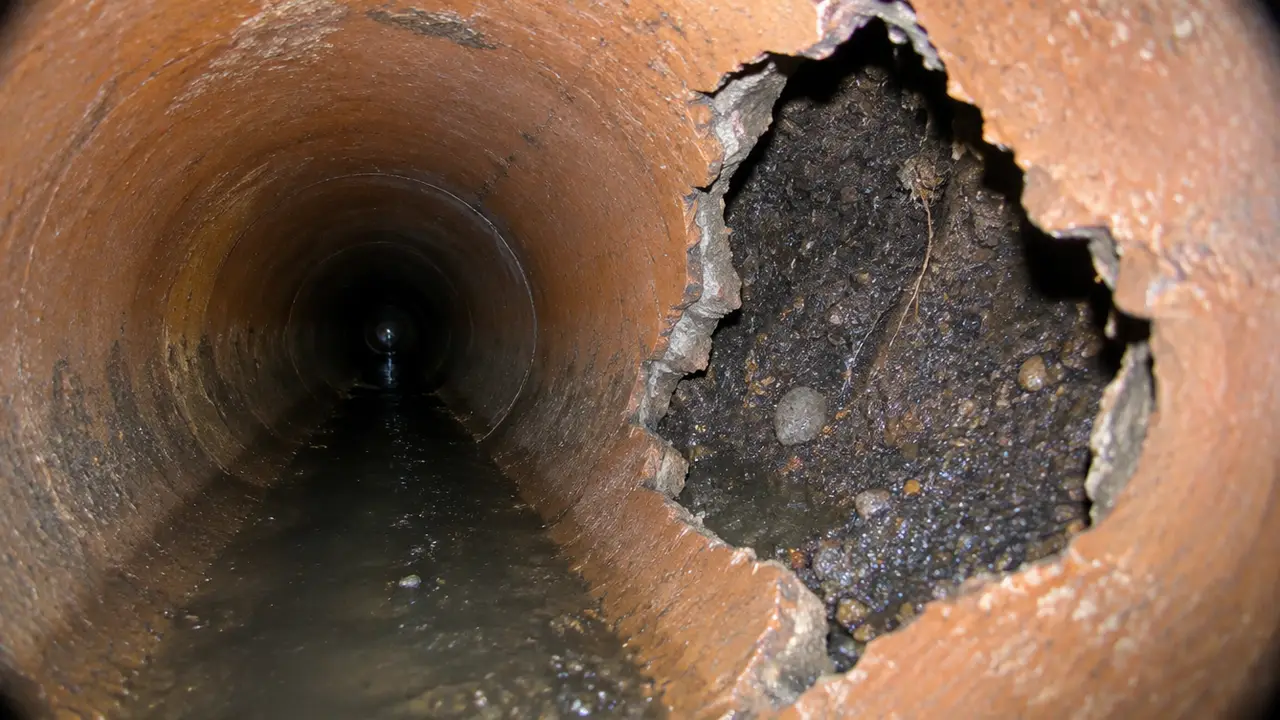
01 /How deep should weeping tile be?
Deep enough to drain the whole basement, which means at footing level. The Part 9 wording reproduced in the 2018 British Columbia Building Code says drain tile or pipe shall be laid on undisturbed or well-compacted soil so that the top of the tile or pipe is below the bottom of the floor slab or the ground cover of a crawl space. On a full basement that puts the tile down beside the footing, lower than the basement floor itself.
The reason for the rule is simple. Water in soil finds its own level. A drain can only lower the water around it to the height of its own openings, so a drain perched above the underside of the slab leaves a layer of water standing against the bottom of the wall and under the floor, where basements leak most. Placing the tile lower ensures the water table next to the basement is always below the floor.
02 /Does weeping tile need to be sloped?
It needs to drain toward its outlet with no low spots, which in practice means a steady fall. The Part 9 drainage section sets the tile’s depth, size, joints and stone cover, but it does not state a minimum slope for foundation drain tile. Installers generally give the loop a slight, even fall from its high point toward the sump or the outlet, and they check it with a level or laser rather than by eye.
Why it matters: water moving slowly drops the silt it carries, and water standing in a dip drops all of it. Farm drainage research makes the same point for ochre. Michigan State University Extension notes that a steeper pipe grade, within limits, promotes self-cleaning and makes low-pressure flushing more effective. A loop that is dead level everywhere still carries water, but it will need flushing sooner, and any belly will hold a pool that never drains.
Corrugated tubing follows the trench bottom, so the bed under it sets the grade. Rigid pipe spans small bumps. Either way, a camera run at the end of the job should show water running, not pooling. More on materials is in clay vs plastic weeping tile.
03 /Which way do the holes go on weeping tile?
Down, for rigid pipe with two rows of holes. Laid with the holes at about the four and eight o’clock positions, the pipe takes in water as the water table rises around it and then carries it along its solid invert. Holes facing up would leave water standing in the trench below the openings, and they let stone and fines drop straight into the pipe. Corrugated tubing is slotted all the way round, so its orientation matters little. If the pipe has printed markings, follow them.
04 /How is a weeping tile loop laid out?
| Part | Where it goes | Notes |
|---|---|---|
| Perimeter loop | Around the outside of the footing, all walls of the basement | Perforated, in clean stone with a filter |
| Outlet leader | From the loop to the sump pit or approved storm connection | Solid pipe so water does not leak out along the way |
| Sump pit | At a low point inside the basement, near where the leader arrives | At least 750 mm deep and 0.25 m² in the Part 9 wording |
| Cleanout risers | At the far corners or ends of long runs, up to grade | Access for camera and jetter; capped |
| Window well drains | From the bottom of each well down to the tile or another suitable outlet | Part 9 requires window wells to be drained |
| Interior cross drains | Occasionally under the slab in very wet sites | A designer’s call; not standard on every house |
Two connections should never be made. Downspouts must not be piped into the weeping tile; roof water belongs on the surface, and Calgary’s lot drainage guide asks for downspouts to extend at least 1.2 to 1.8 m from the foundation so the runoff does not recirculate into the weeping tile. And the loop should not be tied into the sanitary drain; see weeping tile connected to the sanitary sewer.
05 /What about walkouts, garages and retaining walls?
Walkout basements. The footing steps up along the sides where the ground falls away, so the tile steps with it. On the low side the tile may be able to drain by gravity to daylight, but it is also shallower there and more exposed to frost at the outlet. The outlet end needs protection so it does not freeze shut.
Attached garages. A garage usually has a shallower foundation, and the basement wall it sits against may have no exterior tile along that length at all. The loop often runs around the garage or stops at its corners. That wall is a common candidate for an interior weeping tile system, because it cannot be dug from outside.
Retaining walls. Calgary’s lot drainage guide notes that subsurface drainage such as perforated pipe or French drains may need to be installed at the base of or next to a retaining wall to keep moisture away from it, and that retaining walls next to structures should be designed with a professional engineer. That drain is separate from the house’s weeping tile and should have its own outlet.
06 /How are depth and fall checked on site?
With a level line, not by eye. Before the pipe goes in, a good crew sets a reference from a laser level or a string line and measures down to the trench bottom at intervals, so the bed falls evenly to the outlet. They check that the bottom of the trench is below the underside of the slab by enough to fit the pipe and the stone under it. Once the pipe is laid, a quick check is to pour water in at the high end and watch it arrive at the outlet without stopping.
As a homeowner you can ask for three things: a photo of the pipe beside the footing before the stone goes on, the fall the crew is working to between the high point and the outlet, and a camera run once the loop is connected. Those take minutes during the job and are impossible to check afterwards.
07 /What goes around the pipe?
- Clean crushed stone, at least 150 mm over the top and sides in the Part 9 wording, with no more than 10% of the material passing a 4 mm sieve.
- A filter matched to the soil: a sock on the pipe, fabric around the stone, or both. The choice is explained in the weeping tile sock and filter fabric.
- Joint covers on butt-joint tile: the top half of each 6 to 10 mm joint covered with sheathing paper, 0.10 mm polyethylene or No. 15 asphalt or tar-saturated felt.
- Free-draining material against the wall, where used, extending down to the footing so water reaches the drain. The code says mineral fibre insulation or crushed rock backfill beside a foundation wall should extend to footing level for that reason.
Check the edition your province enforces for the exact wording. In Alberta, the National Building Code – 2023 Alberta Edition has been in force since May 1, 2024. If you are comparing a contractor’s drawing with these rules, the Interior vs Exterior Weeping Tile tool and the exterior replacement guide show where each detail fits.
FAQQuestions people ask
Should weeping tile be level or sloped?
It should fall toward the outlet with no low spots. Part 9 does not state a minimum slope, but a steady fall keeps water and silt moving.
Does weeping tile go below the footing?
No. It sits beside the footing with its top below the underside of the slab. Digging below the footing undermines it.
Should downspouts connect to weeping tile?
No. Roof water should discharge on the surface away from the house. Calgary asks for downspout extensions of at least 1.2 to 1.8 m so runoff does not recirculate into the weeping tile.
How much gravel goes over weeping tile?
At least 150 mm of clean crushed stone over the top and sides in the Part 9 wording, with no more than 10% passing a 4 mm sieve.
Do window wells drain into the weeping tile?
Often. Part 9 requires every window well to be drained to the footing level or another suitable location.
NETWORKGo deeper across the HAUSE Sewer network
How to clean outside drain pipes: downspouts, yard drains and weeping tile
How to clean outside drain pipes in Canada: downspout leaders, yard drains, weeping tile, sump lines and the sewer cleanout, plus thawing frozen lines.
SewerCleaners.caWhere is my backwater valve? How to find it, recognize it and open the cover
Where is the backwater valve in a house? How to find it, what it looks like, what access box, sleeve and cover mean, how to open it safely, and valve alarms.
SewerJetting.caHydro jetting weeping tile: how foundation drains are cleaned, and when they cannot be
Hydro jetting weeping tile explained: how foundation drains clog with silt, roots and iron ochre, how they are jetted from the sump, and when to replace them.
SOURCESSources and further reading
- British Columbia Building Code 2018, Division B, Section 9.14 Drainage (National Building Code Part 9 wording)
- City of Calgary — Guide to Lot Drainage, Residential Development (2019)
- Michigan State University Extension — Iron Ochre, Bulletin E3453 (revised August 2023)
- Government of Alberta — Building codes and standards